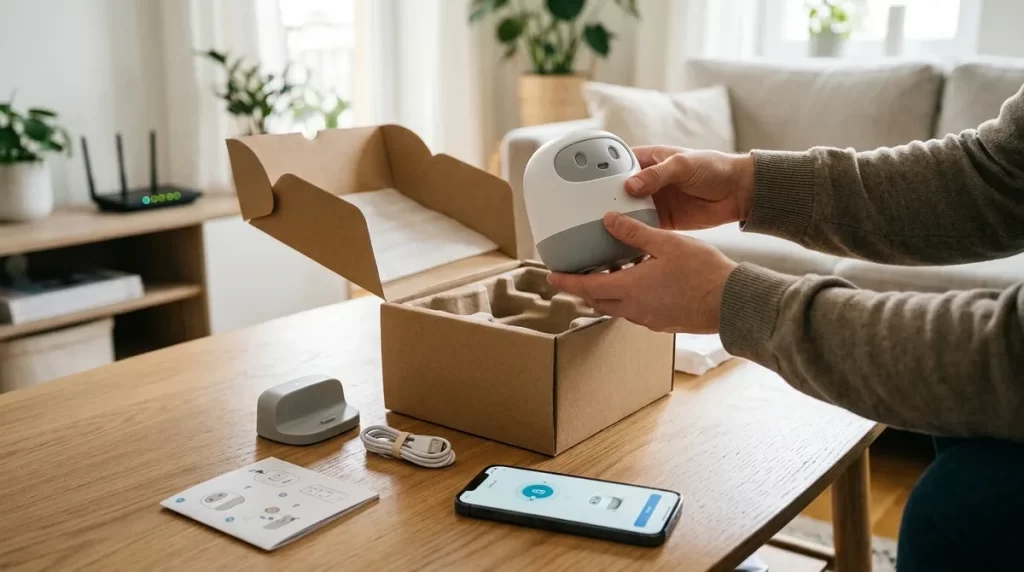
Product-neutral onboarding playbook · Updated July 13, 2026
Set up a robot companion without guessing
A reliable first day is not simply “plug in, connect to Wi-Fi and start talking.” You need the correct manual and app, a safe operating area, a recoverable owner account, stable power, the right network band, current software and a short acceptance test. This guide gives you that sequence while preserving the manufacturer’s instructions for your exact model.
4 model examplesaibo, LOVOT, ElliQ and EMO
24-point checklistPrintable handoff record
Before the box is opened
Prepare the product, room, network and owner
The fastest setup is the one that does not need to be repeated. Before activating a subscription or installing an app, confirm the exact product identity and decide who will control the owner account. This is especially important for a gift, a shared household, a child, an older adult or a robot managed by a caregiver.
Identify the exact model
Record the model, hardware revision, serial number, region and seller. A model family can have different docks, radio support and setup paths.
Find official instructions
Use the URL or QR code printed by the manufacturer. Save the safety guide, current help page and support contact before you need them.
Choose the owner
The intended user should participate. Decide who controls billing, recovery, data deletion and invitations; do not default to a seller or temporary helper.
Prepare connectivity
Have the Wi-Fi name and password available, plus a charged phone with Bluetooth and local-network permissions if the official app requires them.
Clear a safe area
Remove stairs, liquids, cables, fragile objects, deep rugs and other hazards appropriate to the robot’s form and movement.
Protect the return option
Photograph the box and contents, retain inserts and read activation, return and trial terms before discarding packaging or personalizing heavily.
Placement
Design the operating area around the robot’s form
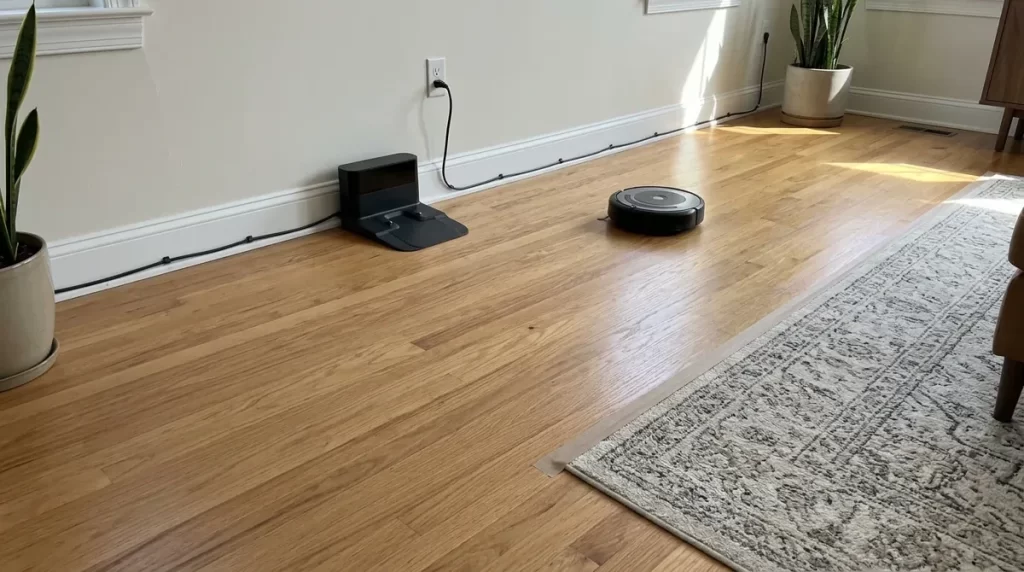
Placement affects charging, navigation, speech recognition, privacy and fall risk. Start in a simple environment and expand only after the baseline test passes. Avoid permanent placement in a bedroom or other sensitive area until every user understands the camera, microphone and remote-access behavior.
| Format | Good starting area | Remove or control | Verify in the manual |
|---|---|---|---|
| Mobile floor robot | One level, bright and uncluttered, with a stable surface and clear dock approach | Open stairs, cords, water bowls, deep pile, reflective edges and low fragile objects | Minimum clearances, permitted floors, boundary features and pickup procedure |
| Desktop character | Wide, level, dry desk away from the edge and direct heat | Clutter, vibration, narrow shelves, liquids and a charger that can be pulled down | Fall protection, supported charger, lighting and safe operating temperature |
| Stationary social device | Stable table near power and Wi-Fi where the intended user spends time | Glare, blocked speakers, private documents in camera view and trip-prone cables | Screen angle, microphone range, ventilation, accessibility and camera behavior |
| Soft therapeutic robot | Clean supported surface with supervised handling | Contamination, unsupported cleaning agents, snag hazards and unsupervised transfer | Charging, infection-control, storage and approved disinfection instructions |
Example of why exact placement matters: Sony specifies clearance and lighting conditions for the aibo charging station; those measurements should not be copied to a different product. See Sony’s official station-placement guide.
Network readiness
Confirm compatibility before changing router settings
A failed connection does not automatically mean the password is wrong. The robot may support only a particular Wi-Fi band or security mode, the phone may be isolated from local devices, or the app may be missing a permission needed only during onboarding. Read the product’s network requirements first.
Prepare
- Update the router and change any default administrator password.
- Confirm whether the robot needs 2.4 GHz, supports 5 GHz or requires both bands to be separated during setup.
- Use the strongest security mode the robot officially supports; avoid open networks.
- Keep the robot, phone and router reasonably close for first pairing.
- Write the Wi-Fi name exactly, including capitalization.
- Know whether a guest or IoT network allows the phone to reach local devices.
Avoid
- Disabling router security or opening ports merely to “make it work.”
- Assuming every robot supports a hotel, campus or captive-portal login.
- Using a phone hotspot as the permanent fix without checking data and update requirements.
- Renaming the entire home network before testing simpler causes.
- Factory-resetting repeatedly when the failure phase is still unknown.
- Sharing the owner password with a seller, forum member or remote helper.
SecurityWPA mode supported
IsolationPhone can reach device
SignalStrong at robot and dock
For account hardening, IoT network isolation, sensor permissions and incident response, use the separate robot companion security and privacy checklist. Setup should establish a secure baseline without duplicating the full security review.
Controlled onboarding
The first 60 minutes, in six phases
Treat each phase as a checkpoint. If a checkpoint fails, stop there and record what you observed; do not stack unrelated changes. Time estimates are planning aids, not promises. Charging and firmware downloads can extend the session substantially.
Inspect and inventory
- Compare contents with the official list.
- Photograph serial and product identifiers.
- Inspect robot, dock, cable and adapter.
- Read safety and first-start warnings.
Pass: correct, undamaged kit identified.
Place power and dock
- Assemble only as the manual shows.
- Use the supplied or approved power unit.
- Provide ventilation and approach clearance.
- Confirm the expected charging indicator.
Pass: stable power with no abnormal heat.
Install app and secure account
- Follow the manufacturer’s official app link.
- Verify publisher before installation.
- Create a unique password and recovery path.
- Enable MFA if the service provides it.
Pass: owner can sign in and recover access.
Pair and connect
- Use the documented setup mode.
- Grant only pairing permissions requested.
- Select the compatible trusted network.
- Wait for both app and robot confirmation.
Pass: device appears under the correct account.
Update and restart
- Keep power and internet stable.
- Do not interrupt an active installation.
- Record firmware and app versions.
- Allow the documented restart to finish.
Pass: current version and normal idle state.
Configure and test
- Set language, time zone and minimum profile.
- Review sensors, history and sharing.
- Test charge, control, audio and movement.
- Record the baseline and next review.
Pass: core functions work predictably.
App and account
Make ownership recoverable and permissions intentional
Search results and app stores can contain unofficial utilities, outdated instructions or similarly named products. Begin from the manufacturer’s current support page. Confirm the publisher name, supported operating-system version and region before installing. A QR code on packaging should resolve to the manufacturer’s domain or an official store listing, not a shortened or unfamiliar download.
- 1
Create the durable owner identity
Use an email address the household controls long term, not an installer’s, child’s school or departing caregiver’s account.
- 2
Secure recovery first
Use a unique password, protect the recovery email, enable MFA or a passkey where offered and store recovery codes away from the phone.
- 3
Register the exact device
Enter the printed product key, scan the model-specific QR code or approve Bluetooth pairing only when the official flow requests it.
- 4
Read before accepting optional data use
Separate terms needed to operate the service from optional analytics, marketing, voice history, AI training or contact sharing.
- 5
Invite people after the owner works
Use named family or caregiver roles rather than sharing the primary password. Test revocation and avoid permanent support access.
Pairing without panic
Diagnose the failed phase before resetting anything
“The app cannot find the robot” can describe several different failures. Identify the last confirmed checkpoint. A factory reset is a destructive last resort because it may unlink accounts, erase learned behavior or complicate an otherwise simple permissions problem.
Power
Does the robot show the documented ready or setup state?
Check adapter, dock alignment, charge time and safety indicators.
Discovery
Can the official app see the correct device identifier?
Check proximity, Bluetooth and the app’s local-device permissions.
Association
Is the robot already attached to another owner, family or region?
Resolve transfer or invitation through the official account process.
Wi-Fi join
Does the router show a connection and does the robot confirm it?
Check band, password, WPA mode, isolation and captive portals.
Cloud activation
Can the app and service complete registration or subscription activation?
Check service status, region, plan and account verification.
Synchronization
Does the device appear online after the expected delay or restart?
Record timestamps, codes and versions before contacting support.
If the robot fails after onboarding rather than during it, use the dedicated robot companion troubleshooting guide once published. Do not follow an unofficial button-hold sequence simply because the enclosure looks similar.
Manufacturer differences
Four examples that prove setup is not universal
These concise notes are orientation, not full instructions. Interfaces, plans and supported regions can change. Open the linked manufacturer guide for your exact model and follow its current on-screen sequence.
Sony aibo ERS-1000
- Set up the charging station with the documented clearances.
- Open My aibo on a supported phone or computer and sign in with a Sony account.
- Add aibo through the current guided flow; some paths use the supplied 12-character product key.
- Complete owner details, connection and initial choices in the app.
- Do not choose “Initialize aibo” as a connection fix; Sony states that initialization erases personality, memories, learning and settings.
LOVOT
- Read the safety material and install the LOVOT app from the official route.
- Sign in, accept current terms and choose “register a new LOVOT.”
- LOVOT 3.0 pairs the phone with LOVOT through Bluetooth; the documented fallback can use a QR code under the sensor horn.
- LOVOT 2.0 and the first generation instead pair with the Nest; their QR location differs.
- Configure internet, name and sleep time, then manage the registered colony through the family account.
ElliQ
- Place the unit on a stable surface near power and reliable Wi-Fi.
- Power on and follow the instructions presented by ElliQ.
- The manufacturer says connection commonly takes about 5–10 minutes when the Wi-Fi password is ready.
- Allow roughly another 10 minutes for the introductory conversation and personalization.
- Invite contacts only with the member’s understanding; remember that ElliQ is not an emergency-response device.
LivingAI EMO
- Use a broad, level desk and the supplied charging equipment.
- Turn EMO on near the phone and install the official EMO app.
- LivingAI’s current setup page specifies an available 2.4 GHz Wi-Fi network; it says 5 GHz is not supported for this setup.
- Open the app, select the correct EMO if more than one is found and finish settings.
- Check firmware through the app or documented voice command while power and network remain stable.
Software baseline
Update once, then verify instead of assuming
A new-in-box robot may contain firmware older than the current app or cloud service. Run the official update only after pairing is stable, power is appropriate and the manufacturer does not require an initial charge. Keep the app in the foreground if instructed and never unplug a device merely because an update appears slow.
Record the baseline
Robot firmware, app version, phone OS, dock or accessory firmware and time started.
Preserve the process
Stable power and internet, expected indicators, no forced shutdown, no movement or charging interference.
Confirm completion
Normal restart, new version visible, robot online, settings retained and core acceptance tests repeated.
Do not confuse setup with long-term care. Cleaning, battery tracking, calibration boundaries and service records belong in the robot companion maintenance guide.
Before declaring success
Run a 12-point acceptance test
A successful setup is observable. Test the functions you actually intend to rely on and record the result while the return or support window is still open. Do not treat an animation, friendly greeting or app dashboard as proof that charging, recovery and privacy controls work.
Personalization
Add complexity in layers during the first seven days
Personalization is more reliable after the basic system works. Change one group of settings at a time and observe whether battery life, prompts, navigation or privacy behavior changes. For a child, older adult or person receiving care, include that person in the decision and keep necessary human contact and emergency systems separate.
Core only
Language, time zone, name, volume, safe room, owner recovery and minimum privacy settings.
Interaction fit
Adjust voice volume, proactive prompts, sleep schedule and movement boundaries based on actual use.
People and data
Add one approved contact or caregiver, test permissions and decide which history is worth retaining.
Decision review
Evaluate usefulness, burden, noise, accessibility, subscription, privacy and whether the return window should be used.
Before adding a robot for a child or an older relative, review our separate guides to robot companions for kids and robot companions for seniors. Setup quality cannot turn an unsuitable product into the right intervention.
Shared ownership
Create a handoff another person can actually use
If a family member, caregiver, teacher, clinician or technician performs setup, the work is incomplete until the intended owner knows what was configured. Do not put passwords in a general household document. Store secrets in an appropriate password manager and keep the handoff focused on identity, behavior and support.
Product record
- Model, serial and purchase date
- Warranty or trial deadline
- Official manual and support URL
- Robot, app and accessory versions
Account record
- Owner email and recovery custodian
- MFA method and recovery-code location
- Named family or caregiver roles
- Billing and subscription renewal date
Behavior record
- Normal lights, sounds and charging state
- Sensor, history and sharing choices
- Movement area and no-go hazards
- What remains unavailable in an emergency
Support record
- Manufacturer case route
- Baseline test date and result
- Normal restart—not factory reset—procedure
- Next security and maintenance review
Print or save
24-point robot companion setup checklist
Common questions
Robot companion setup FAQ
How long does robot companion setup take?
Plan at least an hour for inspection, account creation, pairing, updating and testing, plus any initial charge or large firmware download. A simple stationary product may be faster; a mobile robot with a dock, cloud plan and mapping can take longer. Do not rush an update or skip the acceptance test to meet an arbitrary time.
Do all robot companions require Wi-Fi?
No. Some desktop characters and therapeutic robots have meaningful offline behavior, while connected companions may require Wi-Fi for onboarding, conversation, updates or nearly all services. Confirm what works offline before purchase and again during setup.
Should I connect the robot to 2.4 GHz or 5 GHz Wi-Fi?
Use the band stated by the exact manufacturer. For example, LivingAI currently specifies 2.4 GHz for EMO setup, but that does not establish a rule for every robot. Combined-band routers, isolation and security modes can also affect discovery.
Should I fully charge the robot before setup?
Follow the manual. Some products arrive ready for guided activation, while others require charging or a dock connection before updating. Use only the supplied or approved charging equipment and stop if the battery, adapter or robot becomes abnormally hot or damaged.
Why can the app not find my robot?
Confirm normal power and the documented setup state, then check proximity, Bluetooth, local-network permission, supported Wi-Fi band and whether the robot belongs to another account. Record the exact failure phase before restarting. Avoid factory reset until the official guide or support specifically requires it.
Can I use a guest Wi-Fi network?
Sometimes, but guest networks often isolate devices from each other. That can stop the phone from discovering the robot even when both have internet access. Check whether the router offers an IoT network with controlled local access and whether the manufacturer supports that topology.
Is a factory reset a normal setup step?
Not for a genuinely new, correctly registered device unless the manufacturer says so. Resetting can erase settings, learned behavior or ownership state. Used robots may need an official transfer and deregistration process before the new owner can activate them; a reset alone may not transfer a subscription or cloud account.
The practical standard
A robot is ready when ownership, safety and recovery are clear
The first greeting is only the beginning. A professional setup leaves the right person in control, the robot on a compatible network, software current, sensors intentionally configured, charging repeatable and core behavior documented. It also preserves a safe route back: account recovery, human support, return deadlines and a non-destructive way to diagnose problems.
Start simple, verify each phase and add personalization only after the baseline works. That approach makes the robot easier to enjoy, easier to support and much easier to evaluate honestly during the return window.